
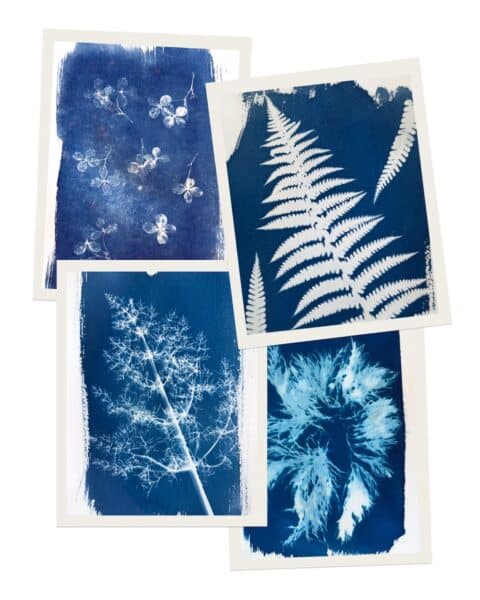
During lockdown I was inspired to play with cyanotype printing. Luckily for most of that first period there was plenty of sunshine and I already had the materials.
Earlier this year I was having a sort out and came across some of the prints I’d made back then. I do have some framed on the walls at home but the rest were experiments or compositions that didn’t work. As I added them to my collage stash I thought about returning to it and experimenting more. Having a series of heatwaves has definitely helped with this!
What is cyanotype printing? Making images using sunlight and paper coated with a light sensitive solution. It’s one of the earliest forms of photography – made famous by Anna Atkins who used the process to create botanical prints. I saw one of her algae prints when I visited the Natural History Museum earlier this year. Have a look here to find out more about her.
It’s an easy thing to learn and do – even if some results are inexplicably not what you expected!
What you need:
- Cyanotype chemicals
- Paper to print on – it can be fun to experiment with different types of paper but watercolour paper is a good one to start with
- A dark box or lightfast bag to store your coated paper in
- Glass and a board ( an old frame can be used for this) and some clips
- Your subject – flowers and leaves are a good choice but anything that will create interesting shapes can work
- A shallow tray or box for rinsing your prints in is also useful
How to print – the basics
- Paint the cyanotype solution onto paper in subdued lighting and then dry in a dark space for approx 24 hours – I put mine in a drawer
- Choose your subjects and arrange on your paper – again in subdued lighting
- Place under the glass and clip in place and expose it to direct sunlight
- Once the paper has turned a bronze colour it’s ready – remove from the frame and remove your subject from the paper. 10 – 15 minutes in strong sunshine is a good guide
- Rinse under cold water until the image turns blue – that’s where the magic happens! Move the paper in the water rather than just soaking it
- Leave to dry and watch the blue turn darker with time
And repeat!
If you want this to be easier you can buy pre coated paper.
Things I’ve learnt:
- You have more time than you think to arrange your subject if you’re in indirect light
- Use glass that is bigger than your paper to avoid clip marks
- Mix a little of the chemicals at a time – store unused mix in a dark glass container
- The heavier the glass the better
- Add tape to the edges of the glass – some frame glass can be a little sharp!
- Use as many clips as possible to really clamp the glass down for good contact
- Trust the process – one of the first prints I did with dried hydrangea flowers – initially looked like it hadn’t really worked but on rinsing and leaving to dry the image became clearer
- Take a photo of the just rinsed version if you like how it looks before it turns deep blue
Once you know the basic process there are so many ways to experiment:
- Applying the solution in different ways – brush marks and rough edges can look great
- Moving your subject during the exposure
- Reapplying the solution and re exposing with a different subject
- Using digital negatives printed on your printer
- Adding soap bubbles to create wet cyanotypes (I did a lot of this last time)
- Toning your prints with tea and other solutions
- Using a UV lamp to carry on when there isn’t sun
- Printing on fabric
All of which I intend to play with over the coming months.
Recommended supplies:
- Jacquard Cyanotype Sensitiser Kit – enough solution to make 50+ prints
- De-ionised water for mixing the solution (tap water has chemicals in it that could alter the results)
- Watercolour paper – 300g weight is good as it stands up to the rinsing
- Brushes and foam applicators
- Light fast box or bag to store pre coated paper
- Cyanoptype paper – also called solar print paper: Lots of options from online retailers.
Books:
- Cyanotype: Learn in a Weekend by Victoria Glover – a good introductory book
- Botanical Cyanotype: A Guide to the Art of Sun Printing : Sarah Bourne Rafferty (published in the UK at the end of this month)
Inspiration:
Some great people to find on Instagram
@caroline_south – I have her mini kit that I can take with me when out and about
@atwaterdesigns – Sarah Bourne Rafferty author of the book mentioned above
@lilachillstudios
@katherinetjacobs – good for videos of her process creating huge cyanotypes